M3 MacBook setup - Before you start
Just as I started my ML/AI bootcamp, my old MacBook Pro's audio stopped working. Repairs would have taken weeks, so I took a leap and invested in an M3 MacBook. It's a game-changer! and setting it up for development is quiet an adventure. I've been taking notes during the setup process, just in case I need to repeat these steps in the future 😅. Here are the first steps.
Before you started
The M3 chip uses ARM architecture, so you'll want to prioritize software and tools that have native ARM support for optimal performance
- Get familiar with Mac Terminal or alternatives:
The Terminal is a command-line interface (CLI) that allows you to interact with the OS and run commands. It gives us access to the Unix command line, or shell.
If you are new to Mac:
Tip: Click the Spotlight icon in the menu bar and type “terminal.”
Apple provides its own built-in Mac Terminal application, but most developers prefers alternatives terminal emulators. Consider using ARM-native options like iTerm2or Warp for better performance. I have personally been using iterm2 for years. Download it here
-
Check on MacOS_version_history for the latest version.
-
Install Xcode Command Line tools (Xcode CLT): Unless you are developing for Apple operating systems (macOS, iOS, tvOS, or watchOS), you don't need the full Xcode package which is huge! You'll need Xcode Command Line Tools for developing software on a Mac. The command
xcode-selectis a utility that you can use to install Xcode CLT directly.
➜  ~ xcode-select --help
Usage: xcode-select [options]

Print or change the path to the active developer directory. This directory
controls which tools are used for the Xcode command line tools (for example,
xcodebuild) as well as the BSD development commands (such as cc and make).

Options:
  -h, --help                  print this help message and exit
  -p, --print-path            print the path of the active developer directory
  -s <path>, --switch <path>  set the path for the active developer directory
  --install                   open a dialog for installation of the command line developer tools
  -v, --version               print the xcode-select version
  -r, --reset                 reset to the default command line tools path
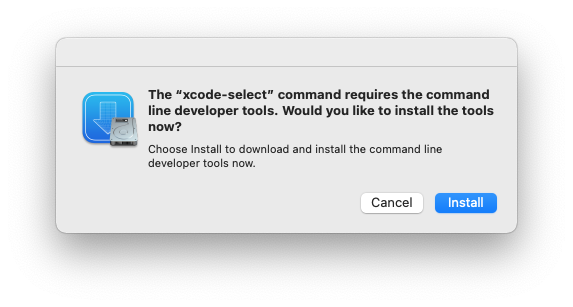
$ xcode-select --install
You will see a popup window that asks you to install Xcode Command Line Tools.
The full Xcode application will be installed in /Applications/Xcode.app/Contents/Developer. To verify run
~ xcode-select -p
/Applications/Xcode.app/Contents/Developer
Test your command line
~ python3 --version
Python 3.9.6
Note: Newer Macs don't come with a pre-installed Python. Prior to macOS 12.3, older macs came with Python 2.7. However, Xcode Command Line Tools gives you Python 3.9.6 but that is not recommended for production use.
3.1. Install Xcode CLT w/ Homebrew: Alternative, you could install Xcode CLT with Homebrew which is a free and open-source package manager that simplifies the installation of software on macOS and Linux. Homebrew has good ARM support now, which makes installing many development tools easier.
/bin/bash -c "$(curl -fsSL https://raw.githubusercontent.com/Homebrew/install/HEAD/install.sh)"
Note!: You will need to provide the password you used to sign into your Mac.
If you haven't already installed XCode Command Line Tools, you'll see a message that "The XCode Command Line Tools will be installed." Press return to continue when prompted by the Homebrew installation script.
Homebrew files are installed into the /opt/homebrew folderon Apple Silicon machines compare to /usr/local/bin on Mac Intel machines.
One main difference is that /opt/homebrew folder is not part of the default $PATH -- a shell environment variable that shows where executable programs are located.
Homebrew shows instructions at the end of the installation process. Follow them and set up a ~/.zprofile.
(echo; echo 'eval "$(/opt/homebrew/bin/brew shellenv)"') >> ~/.zprofile`
- New shell: Did you notice something?
Zshis the default shell program on newer Macs. Prior to macOS 10.15 Catalina, the Bash shell was the default in Mac Terminal. I use ohmyzsh, and open source, community-driven framework for managingZSHconfiguration. To install run and follow its instructions.
sh -c "$(curl -fsSL https://raw.githubusercontent.com/ohmyzsh/ohmyzsh/master/tools/install.sh)"
- System preferences: I personally like to 👀 everything. By default these value are turned off. You can set these from the terminal:
# show hidden files
defaults write com.apple.finder AppleShowAllFiles YES

# show path bar
defaults write com.apple.finder ShowPathbar -bool true

# show status bar
defaults write com.apple.finder ShowStatusBar -bool true

killall Finder;